How to Install cPanel on CentOS 7

How to Install cPanel on CentOS 7
cPanel & WHM is the most popular and most widely used Linux based web hosting control panel that offers graphical user interface to manage and host multiple websites on a single server. WHM is also known as a WebHost Manager provides an administrator and reseller level access to manage server administration and account management related settings. cPanel provides a user level access to manage their websites. The latest cPanel & WHM provide support for CentOS, Red Hat Enterprise Linux, and CloudLinux OS operating systems. cPanel / WHM is a commercial software application that requires a license to work
Minimum requirements
: For seamless and easy installation ensure your Centos 7 meets the following minimum requirements
As mentioned before, a clean and fresh installation of Centos 7
1GB RAM
Recommended 25 GB hard disk space
(Server must have a Fully Qualified Domain Name (FQDN
cPanel license which is valid. However, there exists a trial version of 15 days which is automatically activated once you install cPanel. Thereafter, you’ll be required to purchase the license
Installation of cPanel on Centos 7
Update Centos 7
: Use this command to update the server before installing cPanel
yum update #
You will be asked yes or not that you should type y and press enter to proceed with the update
Installing Perl
Perl is the language that cPanel has been written with
Run the following command to make sure that Perl is installed on the server
yum -y install perl #
Installing Curl
: The Curl is required to download the Cpanel installation script, the Curl can be installed by the following command
yum -y install curl #
Add Hostname
Cpanel requests for a hostname which should be in (FQDN) Fully Qualified Domain Name format. For example, in this topic, we will use host-by.faraznetwork.info and instead of this, you should put your own hostname
: Here is the command to set it
hostnamectl set-hostname host-by.faraznetwork.info #
Disabling Network Manager Service
Network Manager service is used to connect computers with each other, cPanel asks to remove this service or also we can disable it when installing cPanel
systemctl stop NetworkManager #
systemctl disable NetworkManager #
Installing cPanel With trial License
You can use this code to install cPanel
cd /home && curl -o latest -L https://securedownloads.cpanel.net/latest && sh latest #
Based on the resources of your server, the installation may take about an hour to 2 hours
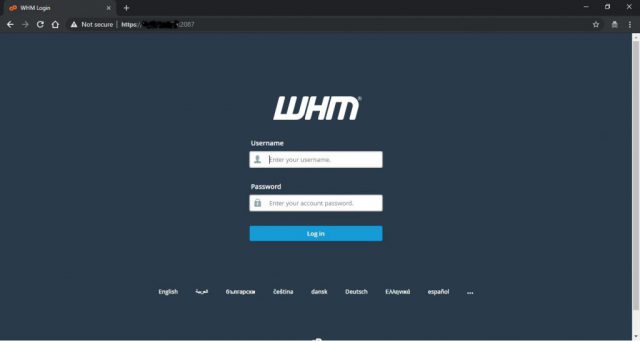
Once the installation was completed you will face the login URL to login into WHM / Cpanel
URL to login to the admin panel of cPanel : https://serverIP:2087
Username to log in to the admin panel of cPanel: It is the root or the username that you use instead of root
جهت مشاهده دوره های آموزشی بر روی این لینک کلیک نمایید.
جدیدترین اخبار مجموعه فراز نتورک را در این صفحه اجتماعی دنبال کنید.
How to Install cPanel on CentOS 7 – نویسنده: موسی رشوند


دیدگاهتان را بنویسید
برای نوشتن دیدگاه باید وارد بشوید.